
Electric Fencing for Livestock: A Practical, Professional Guide
Electric fencing is a reliable, cost‑effective, and versatile option for livestock management when planned, installed, and maintained properly. This guide consolidates best practices for design, installation, training, maintenance, troubleshooting, and safe operation—tailored for beef and dairy cattle across all seasons.
At a Glance: Why Choose Electric Fencing
- Lower cost than traditional barbed wire (fewer posts, staples, and wire).
- Faster installation and easy relocation—ideal for rotational grazing and drought management.
- Effective behavioral control: When properly trained, cattle learn to respect the fence after a single shock and rarely challenge it again.
Key principle: Electric fences are mental barriers, not physical barriers. Their effectiveness depends on correct voltage, grounding, and animal training.
How Electric Fences Work
An energizer (fencer) sends pulses of electricity through the fence wire. When an animal touches the hot wire, current flows through the animal to the ground and back to the energizer via ground rods—resulting in a brief, memorable shock. Reliable performance depends primarily on:
- A sufficiently powerful energizer.
- A robust grounding system.
- Good insulation and wire connections.
- Regular maintenance and fault detection.
Equipment & Installation Best Practices
1) Energizer (Fencer)
- Capacity: Choose “bigger is better”—buy slightly larger than current needs to maintain adequate voltage with vegetation load and allow for expansion.
- Target voltages:
- Summer: ≥ 2,000 volts (dry ground, thinner hair coats).
- Winter: ≥ 4,000 volts (thicker hair, snow/ice reduce grounding).
- Placement:
- Install indoors, or where rodents cannot chew wires.
- Install a lightning diverter/arrestor to protect the fencer.
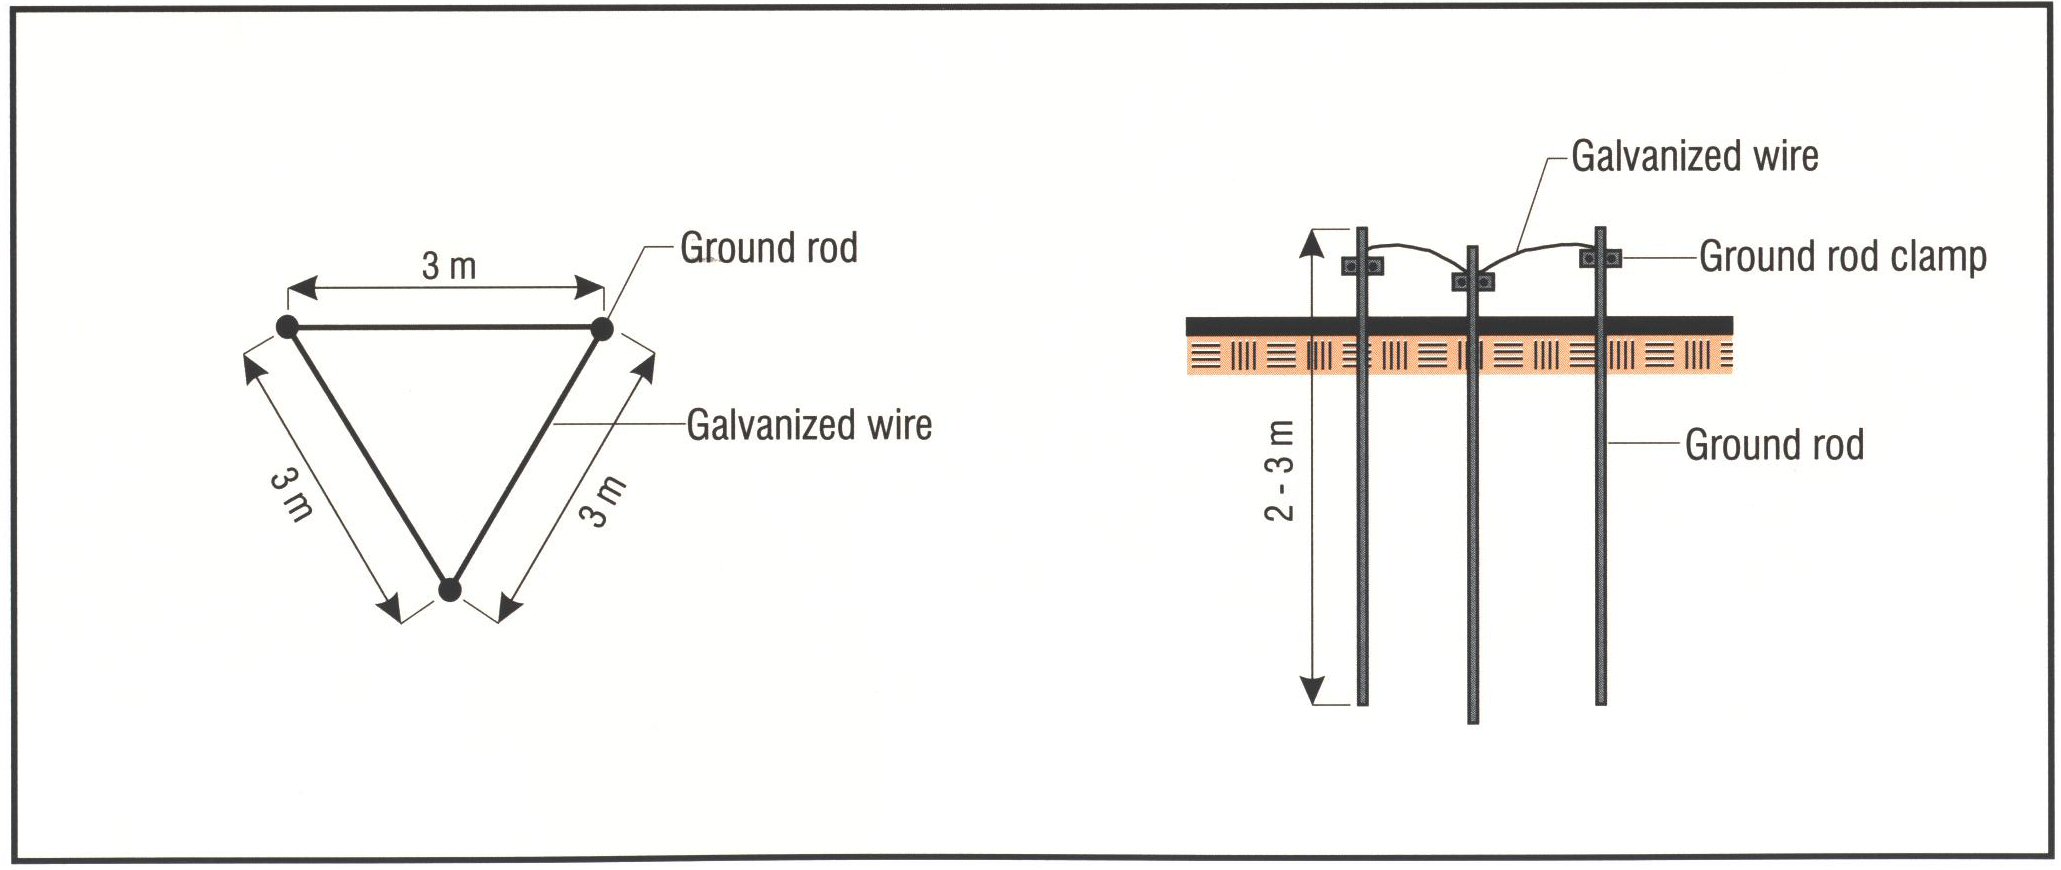
2) Grounding (Most Critical Component)
- Configuration:
- Minimum of 3 ground rods, each 6–8 ft (1.8–2.4 m) long.
- Place rods ≥ 2 m from the energizer and ≥ 3 m apart.
- Use galvanized rods, clamps, and wire for connections (resists corrosion).
- Testing:
- “Ground out” the fence (e.g., press a metal bar against a hot wire) and measure the ground system with a voltmeter.
- If the ground rod reading is > 200 V, add more ground rods.
- A well-grounded system should read near 0 V at the ground rods.
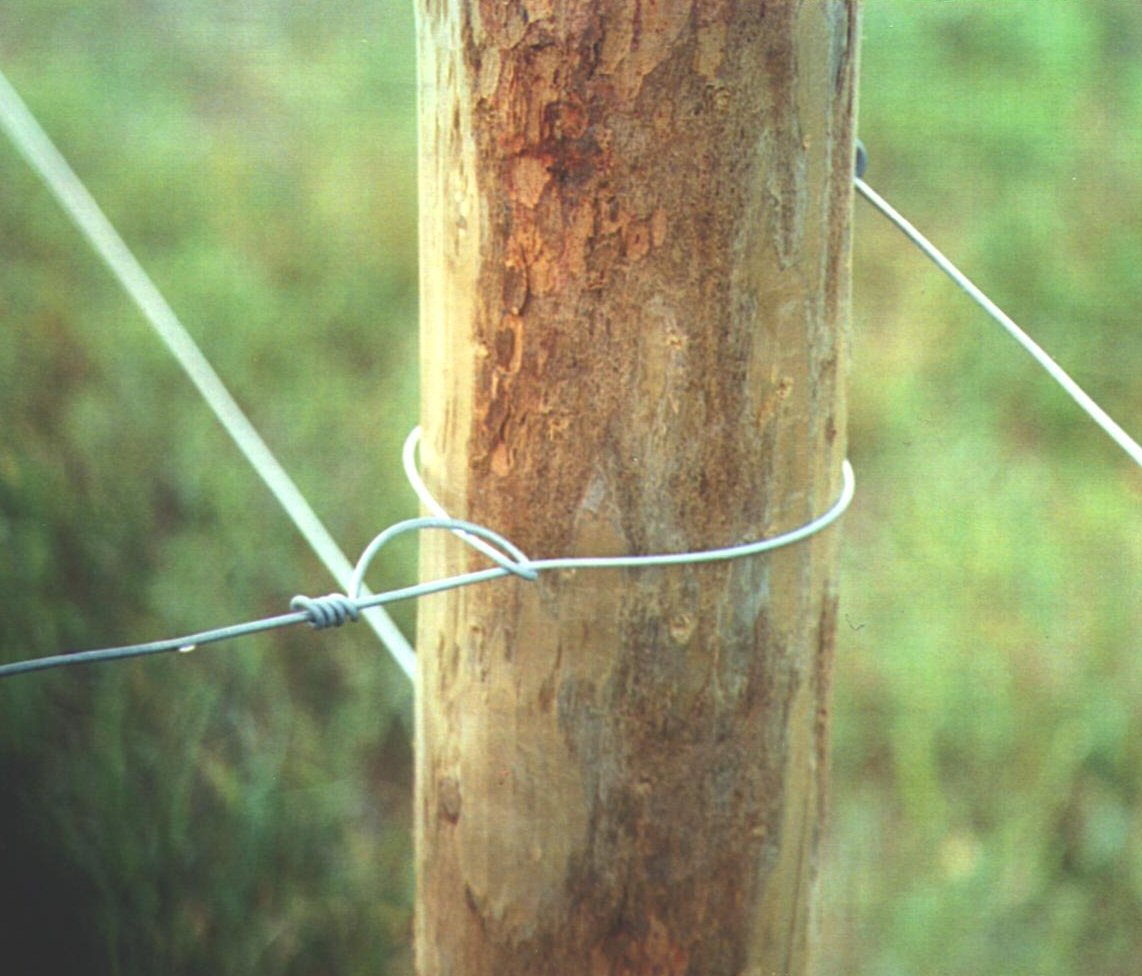
3) Wire
- Use 12½‑gauge galvanized high‑tensile wire.
- Tie knots properly to avoid kinks and breaks (do not tension kinked wire; tie proper knots to reconnect).
- Two‑wire fence heights (from ground): 22 in (56 cm) bottom wire and 40 in (102 cm) top wire.
- Bonding: Connect top and bottom wires together at least every ½ mile (0.8 km).
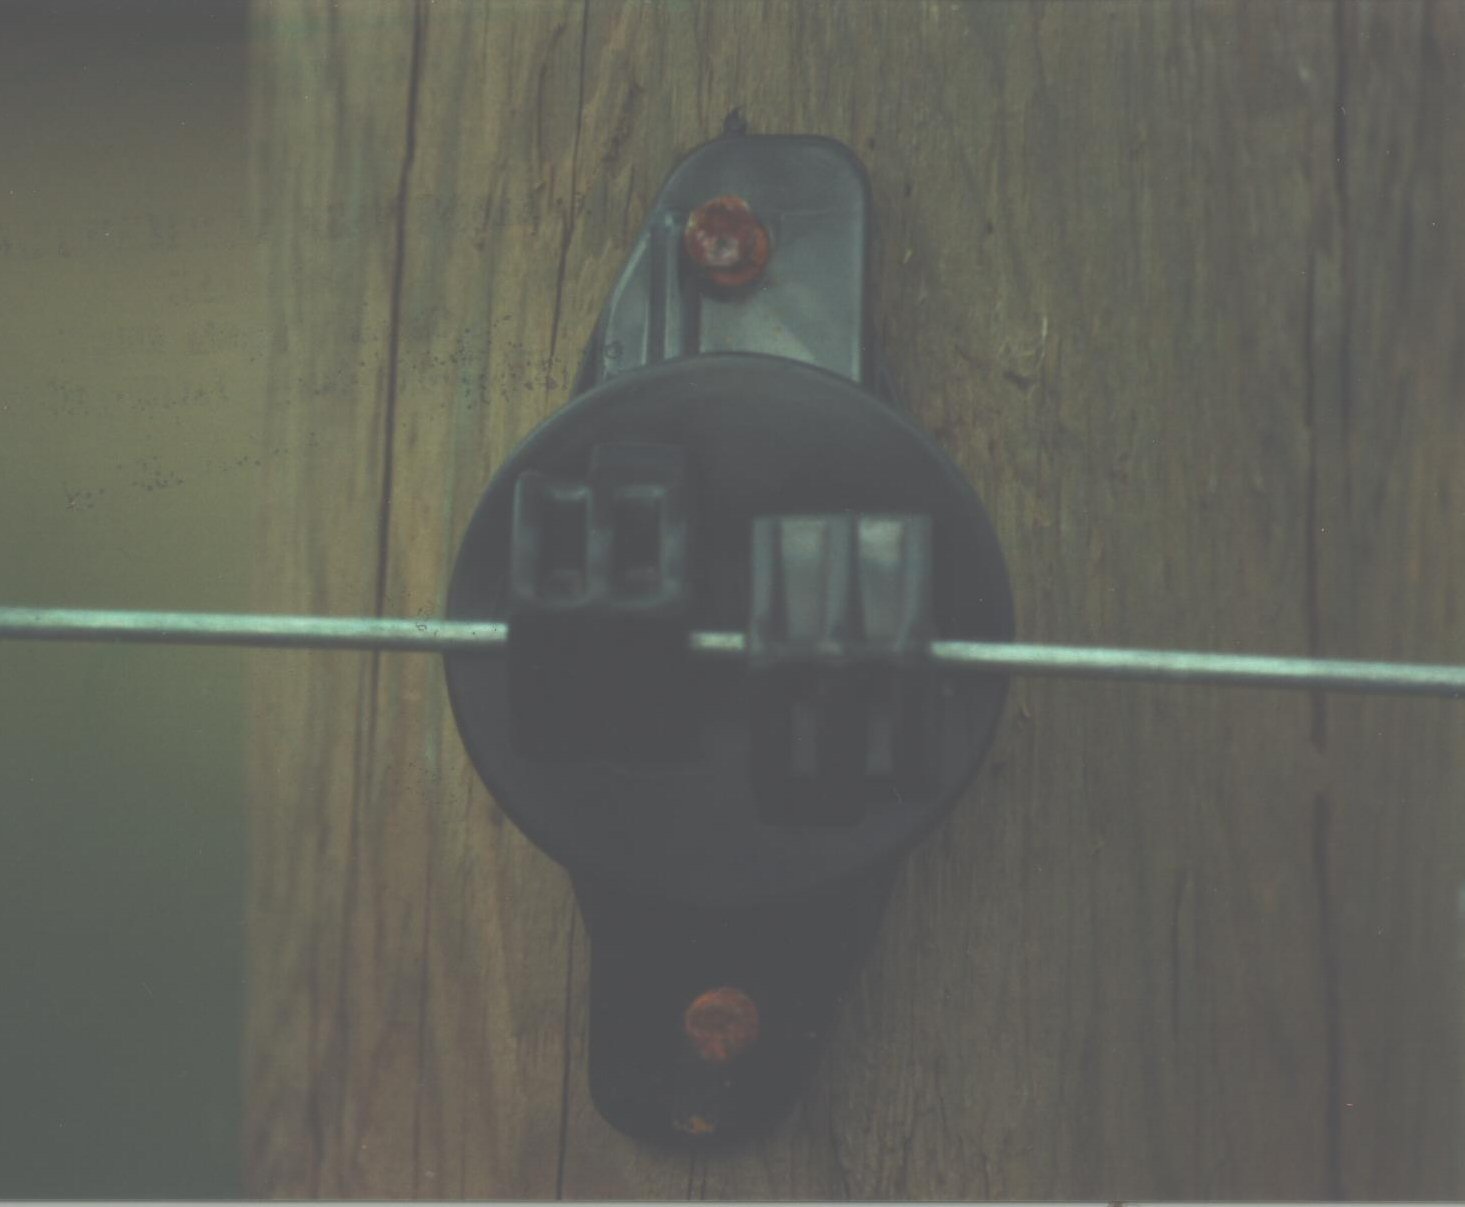
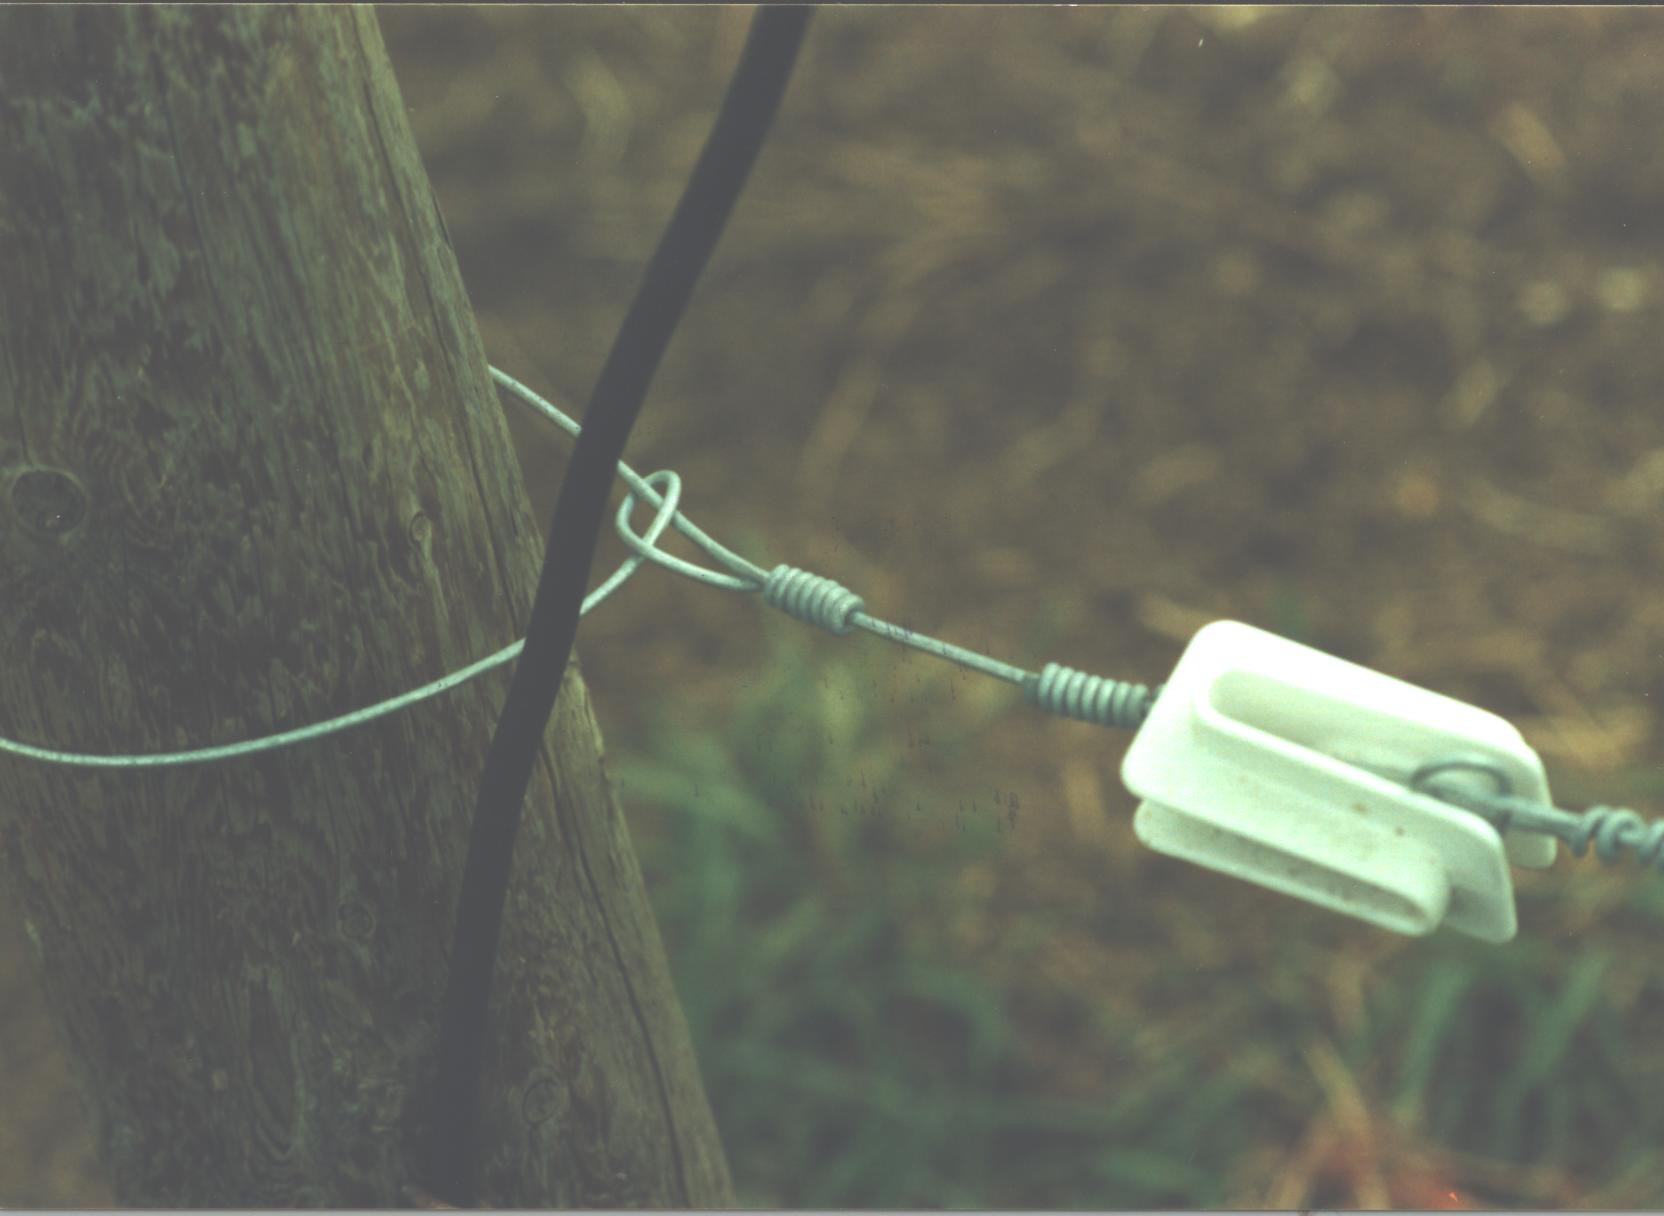
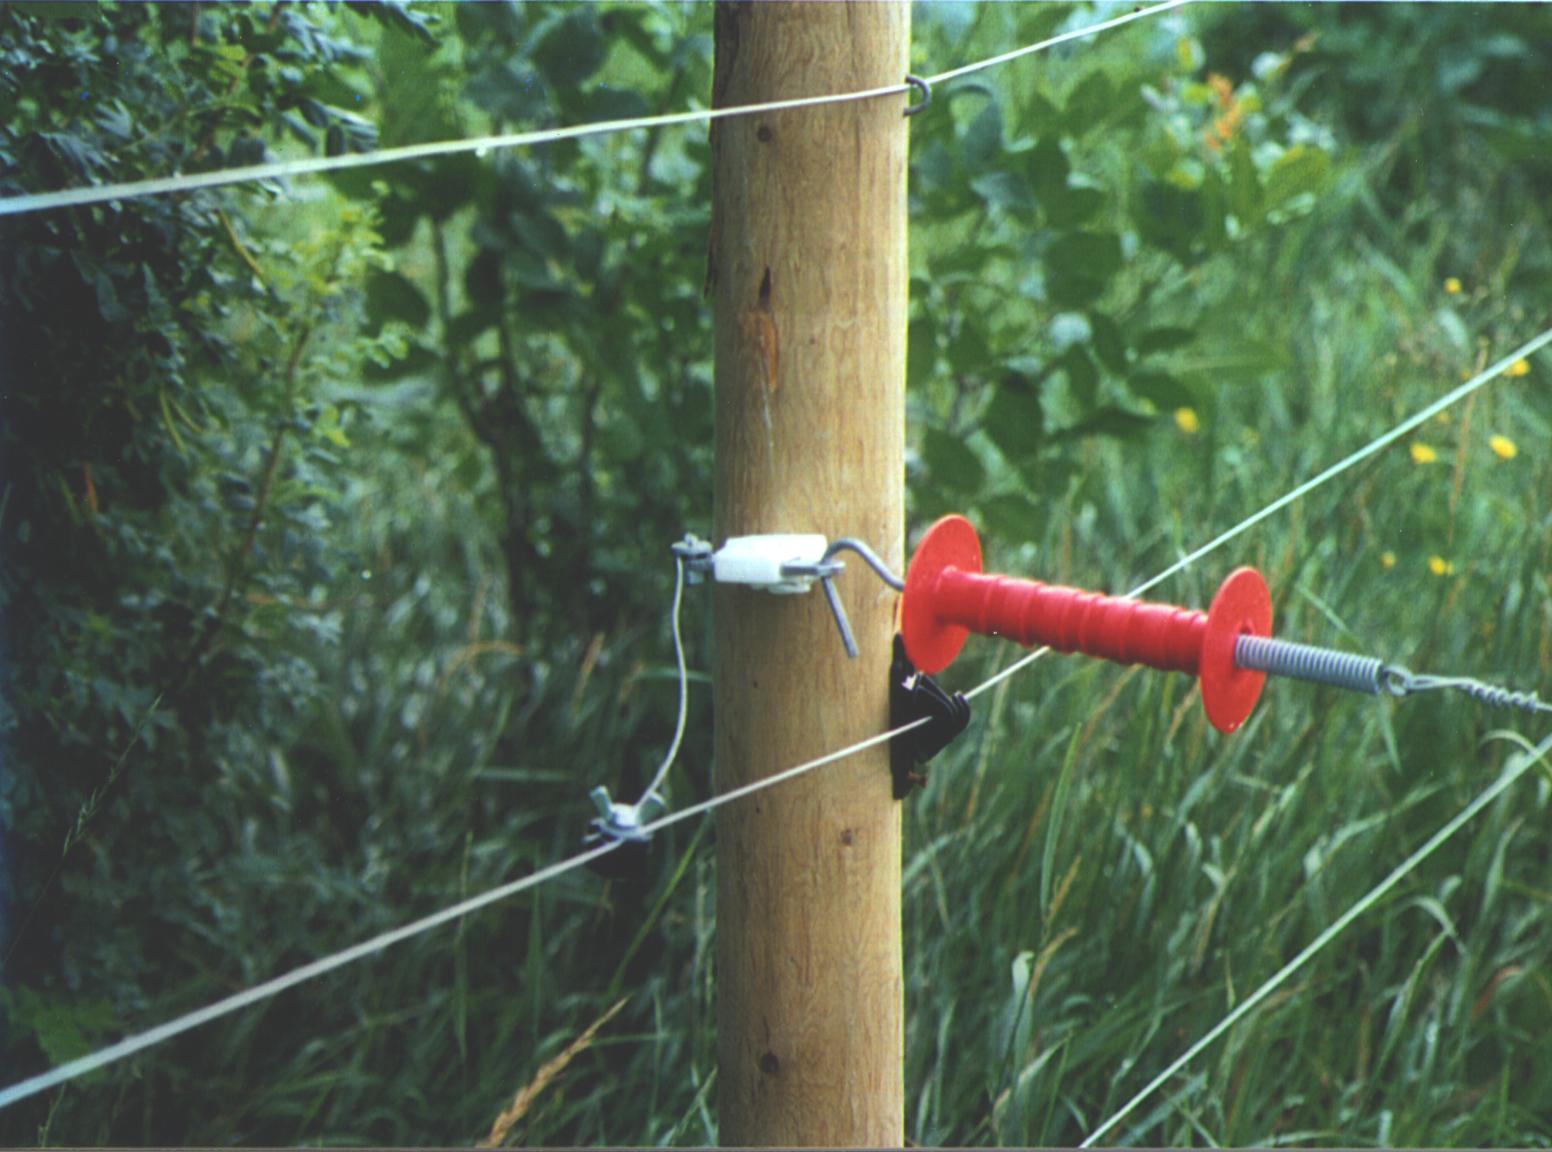
4) Insulators
- Choose high‑quality insulators that secure with two nails (top and bottom). Single‑nail designs often leak power.
- Many manufacturers offer multi‑year warranties—replace broken insulators promptly.
5) Corner Strainers
- Tie corners properly; use porcelain or plastic strainers (both acceptable).
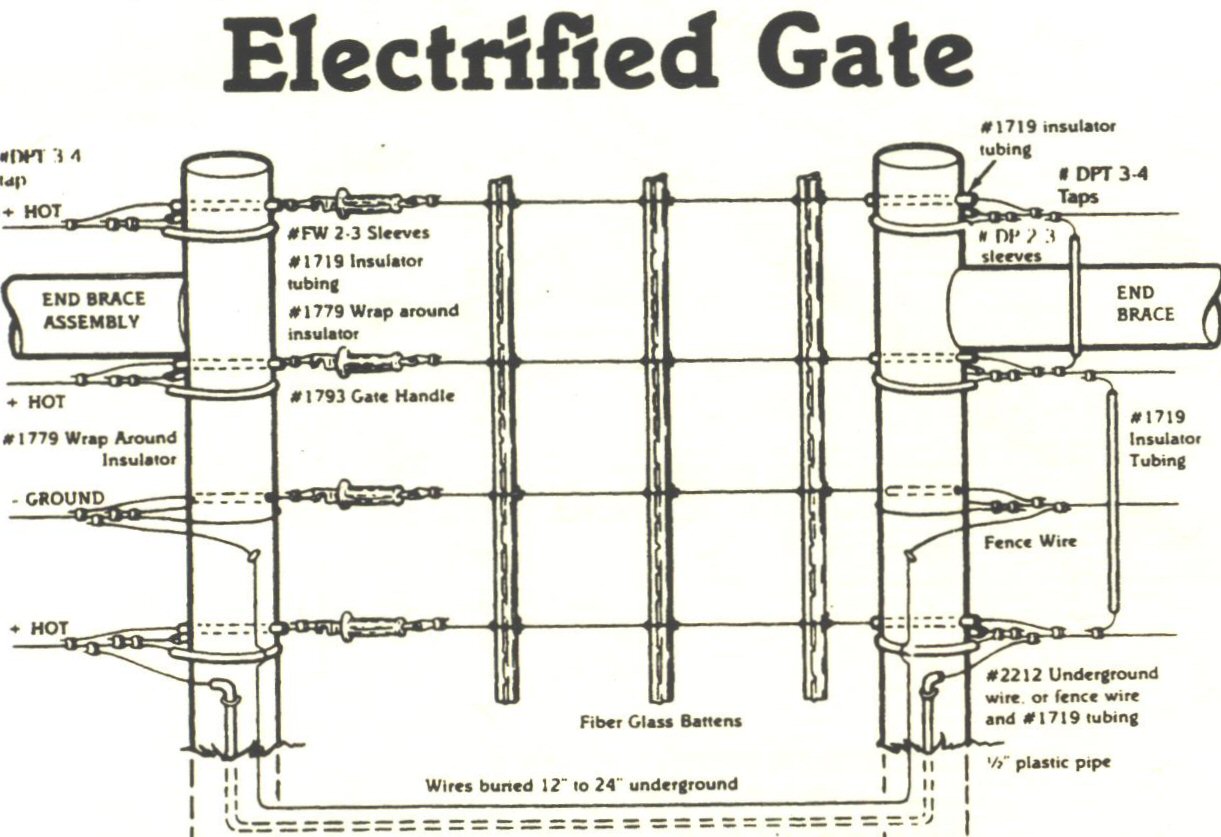
6) Gates
- Use a quality gate kit.
- Install underground coated wire in conduit to carry power from one side of the gate to the other.
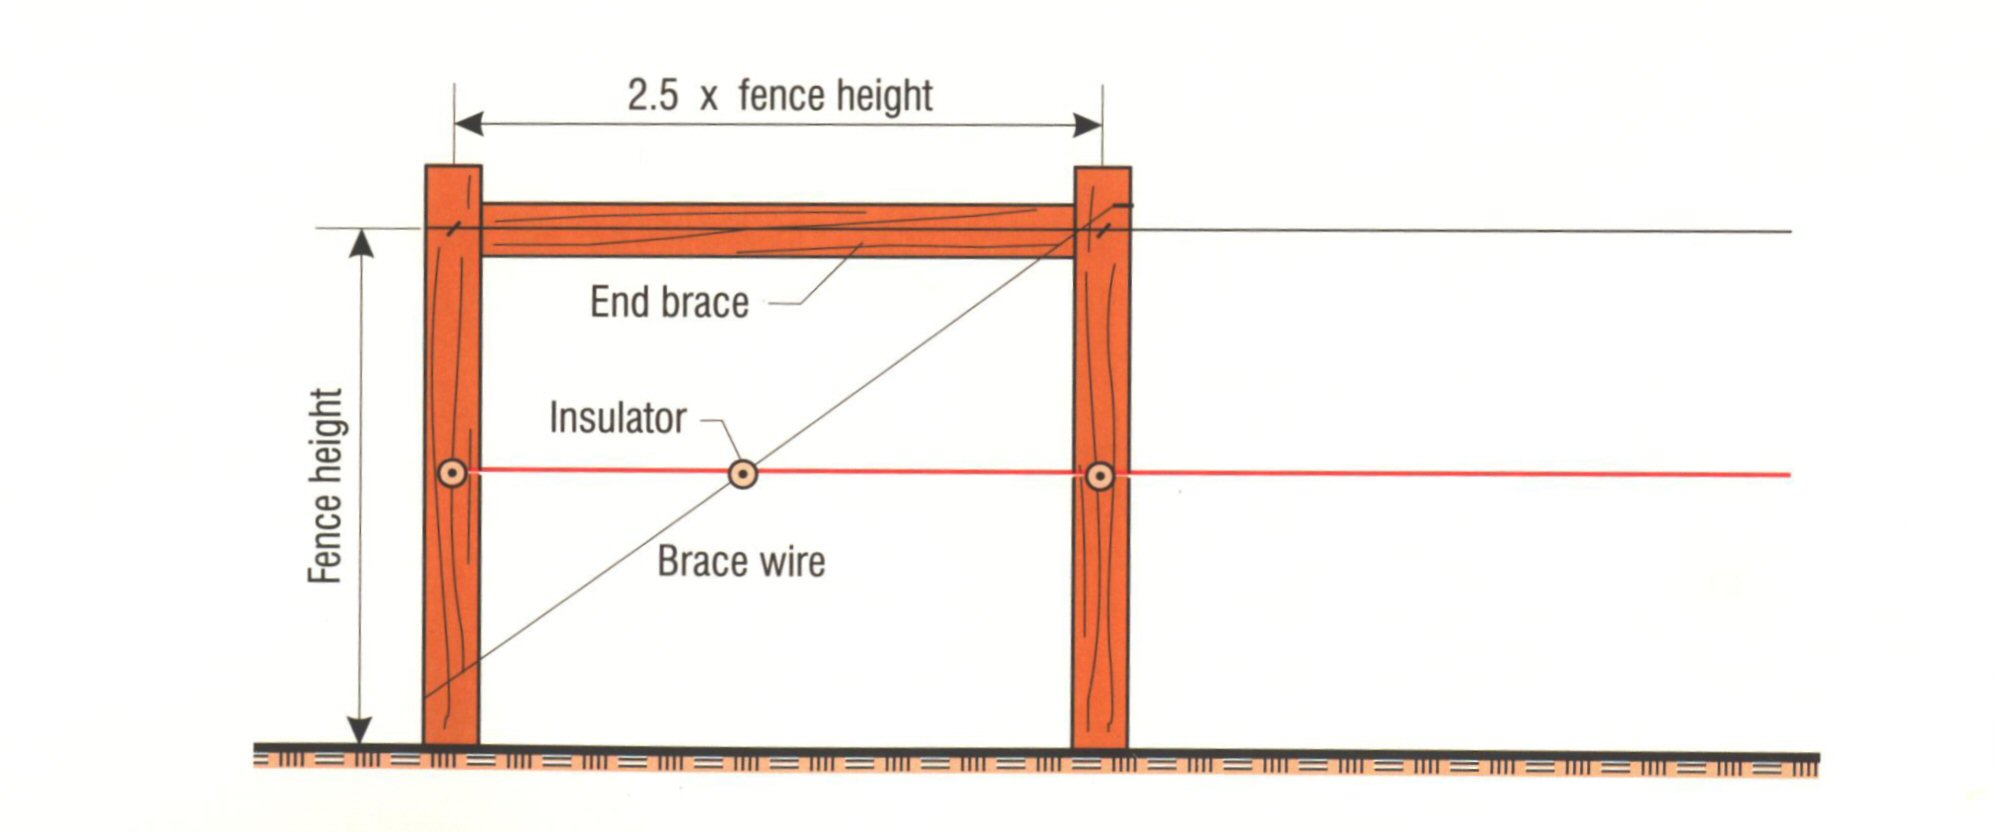
7) Braces
- Braces are the backbone of the fence.
- For single‑wire paddock divisions, a lighter brace can suffice.
- Horizontal brace length should be 2.5× the height of the vertical brace post.
- Corner posts: 4–5 in (10–13 cm) diameter, set ≥ 3.5 ft (1.1 m) deep.
- Ensure the straining wire and horizontal brace are correctly installed.
8) Line Posts
- Level ground: spacing up to 60–75 ft (18–23 m).
- Hilly ground: spacing ≤ 30–40 ft (9–12 m).
Step‑by‑Step Installation Checklist
- Plan layout: Paddock lines, gate locations, water points, and animal flow.
- Install braces and corners: Set posts deep; tie corners and strainers properly.
- Run and tension wire: Avoid overtightening—remove slack without overstraining.
- Install insulators and gates: Use two‑nail insulators; wire gates with underground coated cable.
- Set up energizer: Indoors if possible; connect lightning protection.
- Install ground rods: 3+ rods, proper spacing; use galvanized connectors.
- Bond wires: Connect top and bottom wires at intervals (~½ mile).
- Test voltage: Aim for ≥2,000 V summer / ≥4,000 V winter at the far end of the fence.
- Walk the line: Confirm clear of vegetation and debris.
- Record baseline: Note typical voltage readings for future troubleshooting.
Training Livestock to Respect the Fence
- Use a small training paddock (~3–4 acres), with 3–4 hot wires.
- Attract attention: Tie tinfoil or ribbon to the wire to prompt a touch.
- Target ~5,000 V during training; most cattle learn quickly after one shock.
- After 3–4 days, animals generally avoid the fence.
- Winter option: Use electrified corrals during feeding to reinforce respect.
Maintenance & Seasonal Care
- Carry a voltmeter or fault finder—regular checks keep performance high and speed up repairs by pointing to fault direction.
- Spring walk‑through: Inspect insulators, wire tension, and remove fallen branches/vegetation.
- Vegetation control: Keep grass/brush off wires to prevent voltage drop.
- Winter storage: If not in use, store energizer in a clean, dry place.
- Solar systems: Fully charge batteries before winter storage; check panels and leads.
Solar-Powered Fencing (Remote Sites)
- Solar is ideal where grid power is unavailable.
- If you have an existing solar water system, you can power your energizer from it (ensure correct voltage and capacity).
- Panel orientation: Aim for solar noon alignment. A simple test: place a pencil vertically on the panel at solar noon—no shadow indicates optimal orientation.
- Use a solar charge controller matched to your battery and energizer specifications.
Temporary & Portable Fencing
- High‑tensile electrified wire or poly tape/rope with adequate conductors (temporary tape should have ≥ 6 conductive strands) works well for rotational grazing and drought responses.
- Equipment: Wire reel, step‑in posts, and portable connectors.
- Benefits: Fast to install, easy to move, and cost‑effective for dividing paddocks or creating feed strips.
Safety, Compliance, and Good Practice
- Follow manufacturer instructions and local regulations.
- Post warning signs where public access is possible.
- Keep children and untrained animals away during training.
- Install lightning protection; isolate and de‑energize before repairs.
Don’ts of Electric Fencing
- Do not power barbed wire or use barbed wire on gates.
- Do not use gate wire to transfer power across a brace—use underground coated wire.
- Do not leave fence tight over winter; contraction can misalign braces.
- Do not overtighten wire on install—just take out slack.
- Do not turn cattle into a new pasture (or with untrained cattle) without training—electric fences are not physical barriers.
- Do not run electric wire alongside barbed wire.
- Do not use copper to connect ground rods to the energizer—it corrodes.
- Do not tension kinked high‑tensile wire—it will break. Use proper knots.
- Do not buy low‑quality, power‑robbing supplies—they fail early and cost more over time.
Troubleshooting: Low Voltage (Most Common Issue)
Symptom / Cause |
What to Check |
Solution |
Vegetation/trees on the wire |
Foliage contacting hot wires |
Clear debris and trim vegetation |
Missing/poor‑quality insulators |
Cracked, loose, single‑nail insulators |
Replace with high‑quality two‑nail insulators |
Inadequate grounding |
Ground rod voltage > 200 V when fence is shorted |
Add rods; replace corroded components; use galvanized |
Low battery (solar systems) |
Battery voltage low; poor panel output |
Charge/replace battery; upsize or reorient solar panel |
Energizer too small |
Voltage drops at distance or under load |
Upgrade to a larger energizer |
Quick Reference Specs
- Voltage targets: ≥ 2,000 V (summer), ≥ 4,000 V (winter); ~5,000 V for training.
- Grounding: 3× 6–8 ft rods, ≥ 3 m apart, ≥ 2 m from energizer, galvanized connections.
- Two‑wire heights: 22 in and 40 in from ground.
- Post spacing: 60–75 ft (level), 30–40 ft (hilly).
- Wire bonding: Connect top/bottom wires every ½ mile.
Final Tip
Record your baseline voltage readings after installation. If performance dips, you’ll know what “normal” looks like and can pinpoint issues faster with a voltmeter or fault finder.